Chicken in a Miso Broth with Vegetables and Rice Noodles

wp-image-982565268jpg.jpg

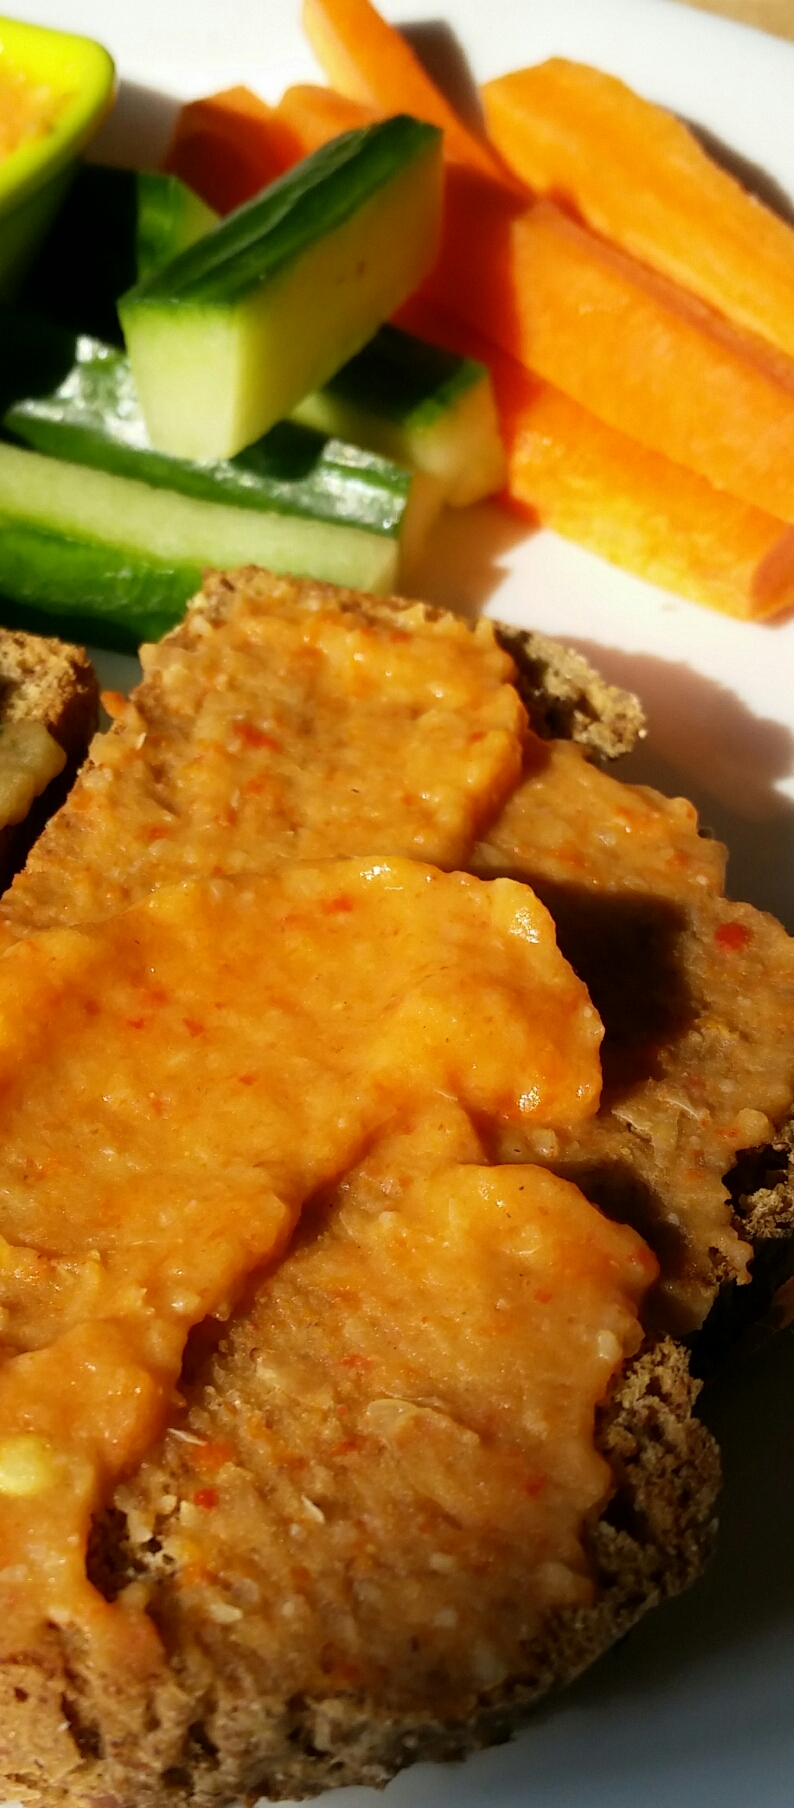
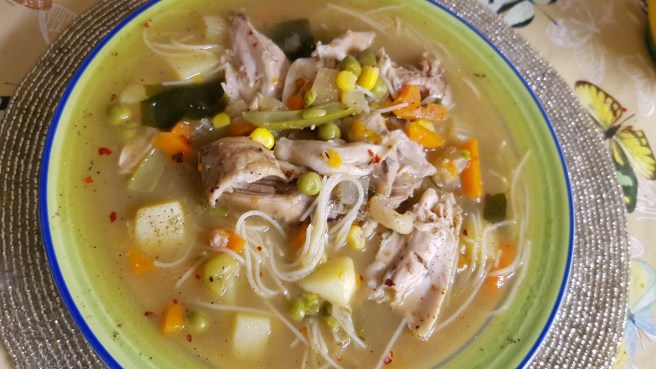
Winter is a time when our body craves for richer and spicier food. The excesses of the festive period gives way to the intention of clean eating and everyone jumping on to the healthy bandwagon in January. Healthy eating does not have to be difficult to prepare and plan. It is also possible to add in flavours from the use of light spicing and aromatic herbs that gives you a more satisfying feel and impression of having a fuller meal. I have been looking at simplifying some of the dinner recipes at home recently and have also incorporated more vegetarian dishes as well as Fish, Turkey and Chicken in our diet. I had posted a recipe for a tasty Turkey and Chorizo Burger not so long ago. I have been revisiting some of the childhood dishes that I enjoyed while growing up in India like Chicken Stew and Khichuri ( Indian risotto with rice and mung beans). I plan to include some of this recipes soon. However I did experiment with the Chicken Stew recently and came up with this Chicken in a Miso Broth with Vegetables and Rice Noodles. Miso is a traditional Japanese fermented paste made from soya and rice or wheat or rye. It imparts a rich and deep savoury note to a dish whether you are making just a plain and simple miso soup or you could use the paste as a marinate. You can buy the Miso in a paste form many oriental supermarkets. For my recipe for more simplicity I have used the The Classic Siro Miso Soup packets which are easily found in our British supermarkets.

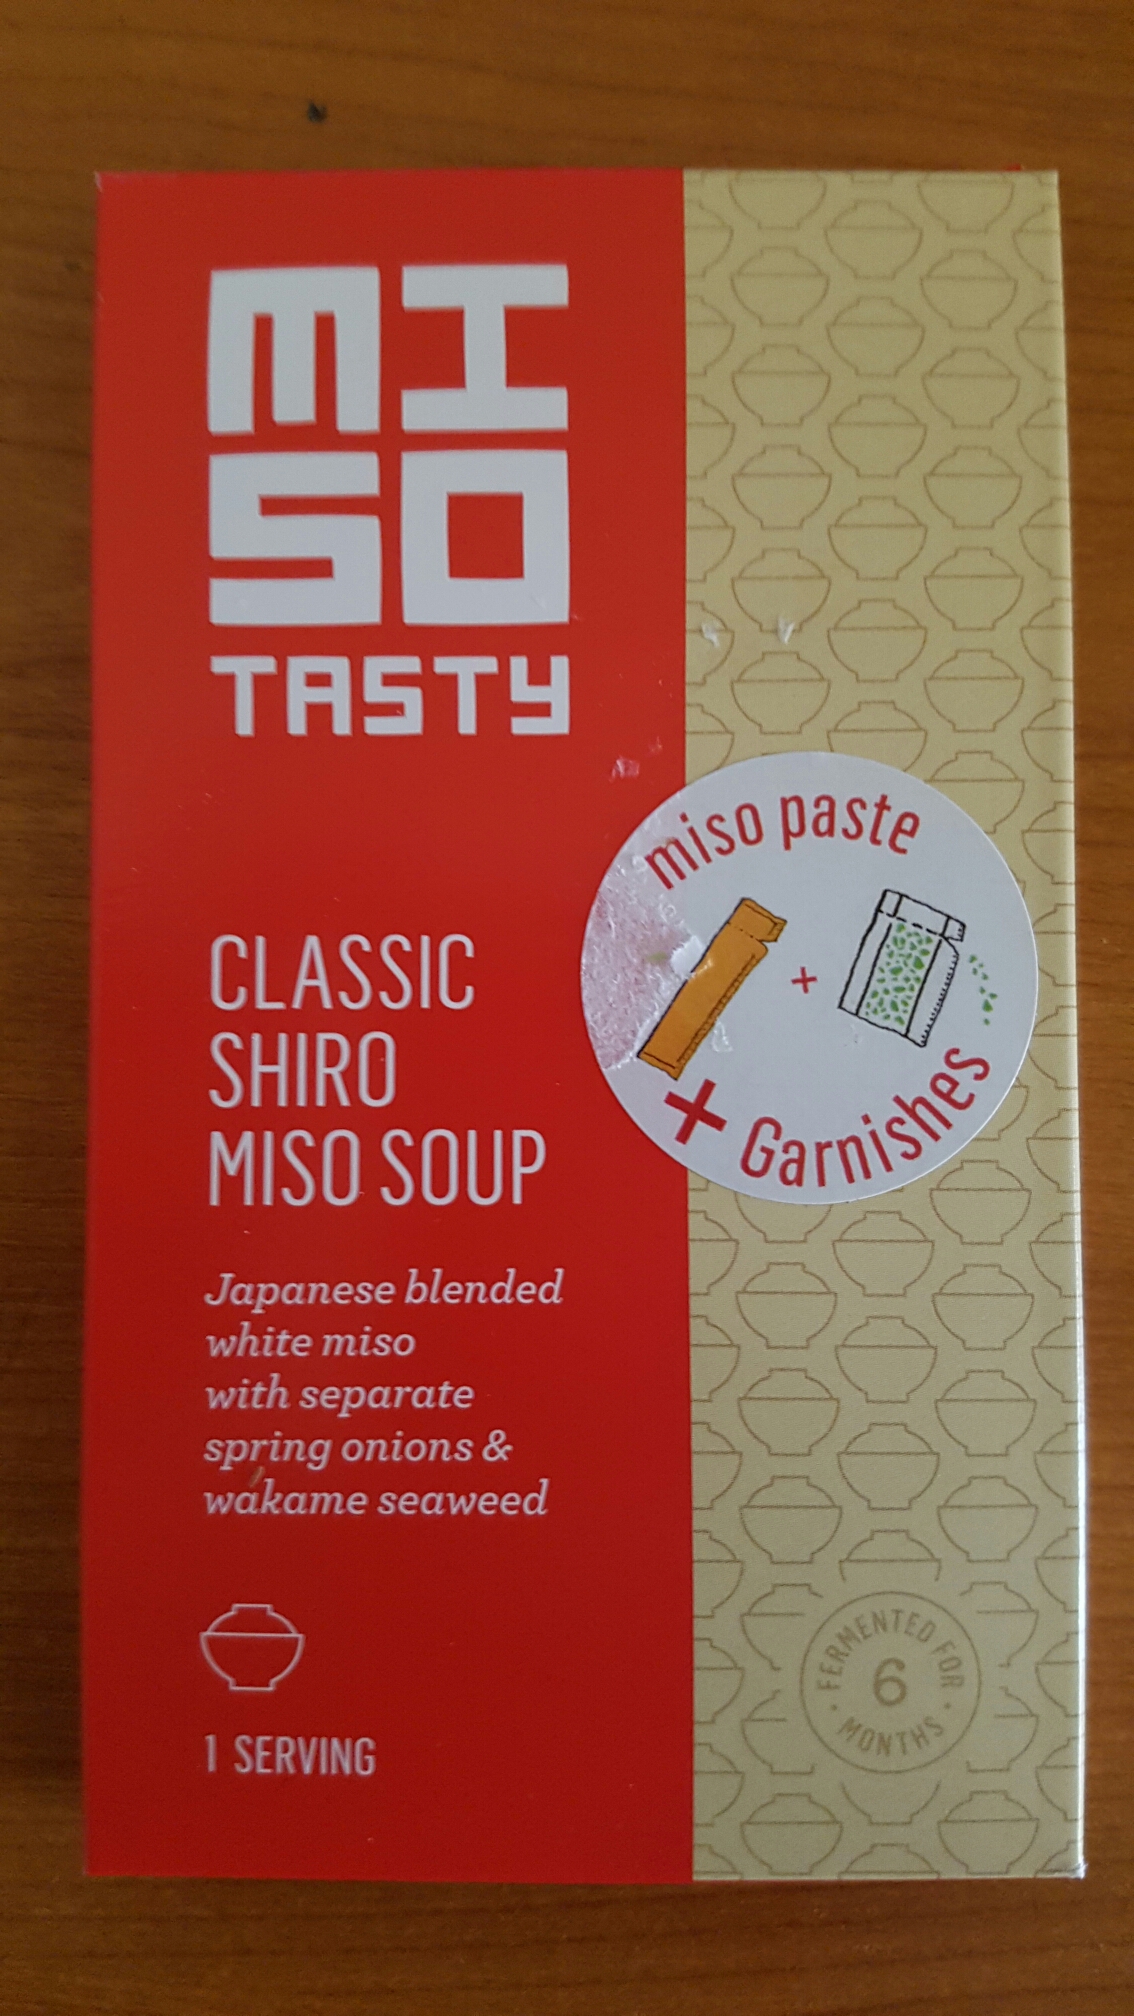
Ingredients (for 4 portions)
8 medium Chicken Drumsticks (skin taken off)
2 Packets of single serving Miso Soup
2/3 stalks of celery sliced
1 medium onion sliced
1 big clove of garlic sliced
Salt and pepper to taste
Fresh vegetables such as diced carrots and sweetcorn or frozen diced mixed vegetables
Rice Noodles 200 gms (allow 50 gms per portion)

Method
Heat a medium pan and add a teaspoon of oil. Add the Celery and the onion and fry for a couple of minutes. Add the Garlic and fry for another few minutes. Add the chicken and fry gently. Add about 500 ml of hot water and bring to a gentle simmer. Skim off any excess fat or the foamy mess if they gather on top. Add the vegetables and simmer for another 10 minutes before adding the paste from the Miso soup. Simmer for another 10 to 15 minutes till the chicken is almost done. Now take the chicken off the liquid and leave on a clean chopping board. Add the rice noodles into the broth adding more hot water if required. Stir gently and bring to a boil. Boil for a bout 5 minutes or according to the Rice Noodles packet instruction. De bone the chicken and a tear into small pieces. Add them back to the broth and add the Garnish part of the miso soup. Adjust seasoning. Garnish with sliced chillies and spring onions and serve hot.

Advertisement

Chicken Korma

image

Korma or Quorma a dish influenced by the Persians and been perfected in the kitchens of the Mughal Emperors. It generally points to a dish of Meat, Game, Poultry or even Vegetables braised slowly with yoghurt or cream (or both) and a paste of nuts. The gravy is usually paler and subtly spiced compared to a lot of the other tomato based gravy that are so common in Indian cuisine. But unlike the way its marketed in the west it is not necessarily a mild (in some cases sweet tasting) dish.

In spite of the long (ish) list of ingredients, please do not be put off to give this a go as its fairly simple to prepare. I like using Chicken on the bone for more flavour and in this case it also holds on to its shape better to stand the slightly longer cooking process. At a compromise use thigh fillets. I also use shallots for its milder and sweeter taste but white onion is perfectly fine to use. The Black Cardamom is optional. It does add a certain smoky flavour to the dish that I personally like but if you do not have it or don’t want to buy it for one particular dish then that’s perfectly fine. The Poppy Seeds and the pumpkin seeds are essential. try and get the white poppy seeds. Use unsalted and unroasted cashew nuts. If using the salted one soak in warm water and drain before making the paste.

Ingredients
Chicken on the bone = 1 Kg
Shallots (or onions) = 400 gms
Ginger & Garlic paste  = 4 tsp
Full Fat Natural Yoghurt = 200 gms
Salt = to taste
Black Peppercorn = about 12
Bayleaf = one large
Cinnamon = an inch stick
Cloves = 4
Cardamom = 5
Black Cardamom (optional) = 1 or 2
Cumin powder = 2 tsp
Coriander powder = 2 tsp
Cashew nuts = about 20/25
Poppy seeds = 2 tsp (soaked in warm water for about 15 mins)
Melon Seeds (Charmagaj) or use Pumpkins seeds = 2 tbsp
Dessicated Coconut = 3 tbsp
Green Chiili = 2 medium
Garam Masala (optional)= 1/2 tsp
Ghee (Indian Clarified Butter) or Butter (optional) = about 3 tbsp
Oil = as required if not using Ghee or Butter (or use a mix of both)
image

Method
Mix the Yoghurt with 3 tsp of ginger and garlic paste. If necessary wash and dry the chicken. put some salt and rub. Then apply the yoghurt mixture and mix well covering all areas. Leave for about 4/5 hours (at least allow for an hour but longer the better). Make a paste with the cashew nuts, coconut, green chillies, melon seeds or pumpkin seeds, poppy seeds and a bit of water to make a medium consistency paste. Slice onions. Heat the Ghee or oil in a heavy bottomed pan over a medium heat. When hot add the sliced onions. Fry till translucent but do not burn them. Add the remaining ginger and garlic paste and all of the whole spices and the bay leaf and stir for about 2 minutes. Now add the marinated chicken and the remaining marinate. stir this for about 10 minutes till all the mixture is well mixed. Add the cumin, and coriander powder. Now add the paste that you made earlier. Mix well. Add a tiny bit of water. Cover with a light lid and cook on a low to medium heat till the chicken is done. Check form time to time to make sure that the meat is not sticking to the bottom of the pan, adding a tiny bit of water if necessary to prevent that from happening. Check Seasoning and add a bit more salt if required. Just before taking it of the heat, sprinkle the garam masala (if using). Stir and Serve.

Steamed White Fish with Vegetables

image

With the Easter holidays, I have been slightly busier than usual and have not been able to spend time blogging as much as I would have loved. The weather is nice for a change and we have been busy exploring the outdoors with my daughter. During this time i have prepared many dishes but have not been able to perfect the dishes or take decent pictures to actually do up the blog. For my next post I have chosen to write about this easy fish dish with vegetables that’s steamed in their own juices. I know that a lot of recipe out there claims to be easy but this really is easy. You could rustle up this in no time and also be able to use fish from frozen. As for the vegetables you are welcome to play around too and use up what’s available. Most vegetables work well here. Over my many attempts, I have used peas, carrots, sweet potato, beans, peppers, sweet corn, baby corn, very thin sliced potato, chopped tomatoes, blanched cabbage, mange trout etc. I have also made this dish with just salt and pepper, with Chinese five spices, with Indian Curry spices and with Thai flavours. They have all worked well so you could use different flavours too experimenting till you come to like one or two. Most of the time I have added a spoon of tomato purée diluted with a tiny bit of water and poured over the top of the fish fillets. I have also semi defrosted the fish in a microwave but if you are using thin fillets then I have also cooked from frozen and have had great results.

Ingredients
2 fillets of any white fish (Pollack was used in the last recipe that’s in the picture)
1 medium carrot cut into medium pieces
1 medium onion sliced
2 cloves of garlic chopped
Handful of peas
5 baby corns cut into medium chunks
Salt and pepper to taste
3 tsp of Chinese five spice mix or Indian Curry powder or Thai 7 spice mix.
1 tbsp of tomato purée
If using Thai flavours add lime leaves or one chopped lemon grass (optional)

Method
Heat a frying pan that has a fitting lid. Add a about a tablespoon of oil. When hot add the garlic and after about 30 seconds add onions. Stir for a minute and add the rest of the vegetables. Stir fry for about 2 minutes. Now place the fish fillets on top and add the salt. Sprinkle the spice and top with the tomato purée diluted in about 5 tablespoons of water. Add black pepper (or chilli powder if more heat is desired) and add lemon grass or lime leaves if using Thai flavours. Now cover with a lid and cook till done. This usually depends on the thickness of the fish and if it was frozen or not. Just check after 10 minutes and then cover and cook more if required. Don’t over cook the fish as it will also continue cooking. drizzle with some fresh lemon juice and serve immediately.

ps. I have created a 13 second video highlighting the process and show you how easy it is to prepare this dish. Please follow the link to view it on my Instagram feed.

Colcannon

image

This is a popular Irish dish of Mash Potato mixed with Cabbage or Kale and forms a nutritional side dish to steak or fish or even Irish Stew. For best results peel the potatoes and cut into big chunks. Wash and soak in cold water for as long as time will allow. When cooking change this water and boil in fresh water.

Ingredients
Floury Potato – 500 gms
Savoy Cabbage or Kale – 250 gms –  chopped finely
Butter – 50 gms
Cream (optional)
Salt and Pepper to taste

Method
Add the potoes in fresh cold water and bring to a boil. Boil till done. Blanch the Kale or Cabbage in salted boiling water and drain. Drain the potatoes and mash. Add the cabbage, butter, cream (if using) and seasoning and mix well. Keep warm and serve when required.

Roasted Red Pepper and Butter Bean Hummus

wpid-img_20150314_101709.jpg

I have often acknowledged my love for roasted Red peppers. I love the smell and the taste of it and often make it at home when I have some spare ones and am using the oven for cooking something else. It’s great as a pepperonata Dip or Sauce (recipe here) and its also a great addition to Hummus. Hummus are very easy to make and are very healthy too. Do not be afraid to experiment with different flavours and trust me the end product will be way better than the supermarket versions that we buy. The following recipe uses Butter beans instead of the traditional chickpeas. The Butter beans produces a creamier end product and so we do not use much oil and do not add any Tahini (sesame seed paste) and thus making it even healthier. Reserve some of the juices that ends up on the roasting pan. Roast the peppers and leave them covered to cool and this helps to peel the skin off easily. make sure that the peppers have cooled down completely before using them. I often roast them after cooking some dinner in the oven and then leave them on the kitchen top covered to cool overnight. This way I also can get fresh Hummus prepared in no time in the morning.

Ingredients
Butter beans – 1 can of about 400 gm
Roasted red pepper – 1 large or 2 small
Roasted garlic clove – 2 medium
Cumin Powder – 2 tsp
Lemon juice – 2 tbsp
Crushed Chilli – 2 tsp (optional)
Extra Virgin Olive oil 4 tbsp
Salt – to taste

wpid-20150314_091211.jpg

Method
Drain the beans and take the skin off (optional) if you like a creamer end product. I take about a half off and leave the other half. Then put all the ingredients except oil in a food processor and process for a minute. If you want to have a less thick end product add some of the juices from the roasting tray. Now with the motor running add the oil slowly.  Mix well. Season and serve with nice toasted bread, or vegetable sticks or pitta bread crisps or whatever takes your fancy.
wpid-20150314_131131_20150314143309144.jpg

Tomato Soup

image

Tomorrow we leave for a two and a half week holiday to India. We spent the day yesterday and today trying to finish up all the fruits, vegetables and other perishables at home. This morning I discovered a few fresh tomatoes and immediately thought of making a simple soup. Winter is a time when we all enjoy a hot bowl of soup. In our home the hand blender is one of the most used kitchen gadget. We often make a soup with whatever vegetables we have at home and also we make a lentil soup using red lentils (recipe to follow later). These all are fairly easy and quick to make. Tomato soup is nutritious and a great way to get some veg into your little ones too. I usually add carrots and celery to mine. If you have any fresh fennel lying around then add a bit of that too. Try and use the best quality tomato you can get hold of as that’s the key ingredient here. I have used canned chopped tomato in the past and they give good results too. Just use a whole 440 gm or thereabout can of good quality chopped tomato. I often add a bit of cream or a spoon of cream cheese or crème fraîche at the end. You can also use fresh or powdered stock for a deeper flavour but if its good quality tomato then I prefer to let the tomato do the talking.

Ingredients
Tomatoes 4 medium sized chopped
Carrot one small cut into dices
Celery one medium stick cut into slices
Onion one small sliced ( I used shallots here)
Garlic 3 cloves chopped
Bayleaf one
Thyme a fresh sprig or a tsp dried
Salt and pepper to taste
Olive oil about 2 tbsp
Double Cream 4 tbsp or 2 tbsp cream cheese (optional)

image

Method
Heat a heavy bottom saucepan over medium heat. Add olive oil. Add the garlic and after a quick stir add the onion. Fry for a few minutes and add the carrots and celery. Fry covered on a low heat stirring often for about 10 minutes. Add the tomato and salt and put the heat up to medium and stir till the juices from the tomato starts to come out and the mixture starts to turn into a pulp (around 10 mins). Now add about 300 ml hot water and bring to a boil. Add the Bayleaf and thyme. Lower the heat and simmer for abound 15 minutes. Take off the heat and blend using a hand blender. Add cream or cream cheese if using. Dilute if necessary. Bring to a gentle simmer. Season the soup and serve immediately with some crusty bread. ENJOY!!
image

follow me on twitter @kaushikpauluk

Creamy Chicken Kebab (Chicken Malai Kabab)

Its incredibly easy to prepare Kebabs at home yet it seems that many people shy away from preparing them as perhaps they are not so sure about the marination or maybe they think that its a lot of hard work. They get cooked in BBQ’s (either shop bought or home marinated) but not considered much for general home cooking. Chicken Kebabs are very easy to prepare, are very healthy and are quick to cook. A bit of advance planning with the marination will ensure that you can have your dinner ready in less than 30 to 40 minutes, ideal for cooking when slightly short on time. Get the Meat marinated ahead and leave in the fridge overnight or for as less as 3 hours. If cooking after coming back from office or so try and leave it outside for a bit while you freshen up or get changed. The grilling itself takes about 10 to 20 minutes. Its best served with some light salad, pilau rice (Can be shop bought microwave version) or even a ready made tortila wrap. In India it gets served with Paratha Bread or Naan, usually a mint Chutney and some salad with onions.

Today’s recipe is for Chicken Malai Kebab (Creamy Chicken Kebab). Its my modern take on a Indian Classic. The end product is deliciously moist and the mild creamy nature is a big hit with the young fussy eaters too (if preparing for them perhaps omit or reduce the chilli, I use a separate marination without the chilli). I find that about 3 hours is enough for the marination but anything upwards of an hour should suffice. You could decide how healthy you want to make this dish (you could use light cream cheese or substitute half of it with sour cream or Greek yoghurt. But ). Some recipes call for two stage marination ie one first on with salt, pepper, ginger and garlic and after about 30 mins a second one wit the rest of the ingredients. I leave it up on you to decide how you want to do it depending on the time that you might have on your hand. While cooking keep an eye on it and try and not dry out the surface too much. Cut and check one inside to see if it has cooked. I use a George Foreman Gill and so it looks quicker and gives a lovely char grilled marks on the meat. In the following picture I have had to use red chilli as I did not have any green chilli at home at that time but green is much better in this recipe. (I have a shop bought Chilli Garlic Grinder that also includes fennel and I have used some of that in the marination but that is not necessary)
20150127_164300

Ingredients :

  • Chicken Breast 500 gms cut in medium chunks
  • Ground White Pepper half tsp (or black if you do not have white pepper)
  • Salt to taste
  • Cardamom Powder half tsp (use freshly ground if possible using the seeds inside a pod or if you do not have it use allspice instead, see below)
  • Ginger paste 2 tbsp
  • Garlic paste 1 tbsp
  • Green Chilli 2 nos or to taste
  • Corriander Leaves a handful
  • Cumin Powder half tsp (if you do not have this you can use a readymade curry powder)
  • Garam Masala (use allspice as a substitute but do not add Cardamom powder) half tsp
  • Cream Cheese (eg Philladelphia) about 4 heaped tbsp
Method :
Pat Dry the Chicken pieces and apply half the salt and the white pepper. Rub and leave it aside while you are preparing the rest. Make a paste of the ginger and garlic (if making your own) with the chilli, coriander leaves, rest of the salt, cream cheese cumin powder and the garam masala. Rub the chicken well with this mixture coating all the pieces well. Cover with a cling film and leave in the fridge. Soak the wooden skewers if you are using any.
Heat the Grill and skewer the marinated chicken using the soaked skewers without overcrowding them. (You could put them directly onto the George Foreman grill and cook without the skewers.) . Place on or under the grill and cook the chicken rotating regularly as necessary. Keep an eye on this as they cook very fast. the cream cheese will cause some lovely colouration on the Kebabs and take a piece out and cut in half to check whether its cooked through or not. If you overcook this it will dry up quickly (the outside should retain some moisture. You could also brush the Kebab couple of time while cooking using melted butter for a really yummy moist result (I did not follow this step on this occasion). Once you have checked if they are cooked take them off the grill and serve immediately. ENJOY

Bolognaise Sauce (Ragu)

wpid-20150201_153334.jpg

Bolognaise is one of the most common form of an Italian Meat Sauce that’s popular the world over. However there are no standardised recipe and presumably every family have their own version largely influenced by which part of Italy they come from. When I came to UK first I got introduced to this very tomato rich sauce with mince meat and often had mushrooms thrown in. Most of the generic ones that I had tried used to repeat on me and I found them very acidic. That put me off initially and then I would not order it from a menu based on my prior experiences and the same went for Lasagne. But I liked the concept. It was much later that I started researching it and got drawn back into it so much so that I wanted to create a version that agreed with me. In 2007 Heston Blumenthal had a show on Television that got my attention. It also revolutionised the way I perceived Bolognaise Sauce. He used milk like they use in certain parts of Italy that I previously did not knew could be done. So I simplified the process to suit me and came up with my own version. You can also read about different techniques on The Guardian’s website here or follow a close version of the original recipe here on Kok Robins’s blog.

I am not claiming any authenticity here but this is a recipe that I have come up using easily available products that tastes good and is not overly complicated. This is also a healthier version where I have cut out some of the initial oil, used lean mince and have not used any cream or butter at the end. It does take a bit of time but its the time that makes this sauce in my opinion. The amount of each each ingredient varies as I do not have any fixed amounts yet so most of them are approximation.

wpid-20150201_114930.jpg

Ingredients:

Olive Oil 50 ml
Garlic 3 large cloves chopped
Red Chilli 1 medium chopped
Onion 1 large diced
Celary 3 stalks diced
Carrots 2 medium diced
Bayleaf 2
White Wine 100 ml
Milk 250 ml approx
Lean Mince Beef 450 gms
Good quality seasoned Sausages 8 (slightly course mix is preferable)
Salt and Pepper to taste
Tomato Puree 1 to 2 tbsp
Worcester Sauce 1 tablespoon
Fish Sauce 1 tablespoon ( I have also used Anchovy paste instead )
Staranise 2 whole
Thyme 2 tsp dry or one fresh sprig (I have also used mixed dry Italian herbs instead)

Methodwpid-20150201_121554.jpg

Heat oil in a heavy bottom casserole dish. Add the chopped garlic and chopped chilli and stir. After a minute add diced onion, carrots, and celery. Sprinkle some salt and sweat it over low to medium heat with the cover on for about 20 mins stirring often. Turn up the heat and add the white wine. Fry for a bit longer but without browning the vegetables till the wine is absorbed. Now add the mince meat and the sausage meat. Fry and break up the chunks as you go along. Now add the Worcester Sauce, fish sauce, and salt and pepper.
wpid-20150201_122251.jpg
Add the Bayleaf, thyme and star anise. Stir for a about 10 minutes and then add just enough milk to cover the mixture. Now bring to a boil and simmer on a very very low flame for about one hour stirring occasionally. Now add the tomato puree. Add any vegetables if you want like mix veg or peas if you wish at this stage. Stir and simmer on low flame for a further 30 minutes. Check for seasoning and serve with a good quality pasta with grated Italian dry cheese on top.

We also use the same sauce to make lasagne at home using shop bought lasagne sheet (also green lasagne sheets), home made bechamel sauce and little cheese on top.

Update N8vember 2018: I have recently found Aldi selling a 5percent fat Beef and Pork mince in a 750 gsm pack and have used it instead.

20141010_190928

Pepperonata Sauce

20141011_182112

There is something nice about the smell of roasted peppers. Pepper roasted in the Oven with a bit of Olive Oil will stay in a fridge for up to 10 days or more (ours are usually gone by two days). We mostly use them to make a simple creamy Sauce. You can also have the slices in a salad, pizza toppings, sandwich filler. The sauce is a good way to get more veg into fussy children too as they will love sweet creamy taste. If you make the sauce slightly thicker then you can also use it as a dip or a spread. We usually make ours slightly thicker and store in a closed container for a few days. We dilute it and use it for a quick pasta sauce. We also often add diced Chicken or prawns to make it into a more substantial meal.

We use red peppers where possible and also the yellow peppers but have found out that the green one do not work for this recipe. Usually find that two red peppers and one yellow pepper is enough for about 4 portions give or take. Put the peppers in a roasting tin. Cover with olive oil and roast in an 200 degree C oven for about 30 to 40 mins turning 2 to 3 times till the skin gets gently charred. If uou have a barbeque then you could roast the peppers on it. Take out into a bowl and cover with a foil and let cool. Roast the garlic cloves in the same pan for about 10 to 15 mins stirring few times without burning them. Meanwhile fry some sliced shallots or small white onions in olive oil till soft and translucent. Use a coverd pan over a low heat stirring frequently. This could take some time. When the onions are done let it cool. While that’s cooling peel the charred skin of the peppers and cut and take the stalk and seeds off. Add everything together and blitz in a food processor adding about 4 tablespoon of soft cream cheese and 4 tablespoon extra virgin olive oil, salt and pepper. Don’t overdo this as a bit of texture is preferable.
image

Serve mixed with freshly cooked pasta (usuing a bit of the drained pasta cooking water to loosen the mixture. We love ours as it is or with the addition of chicken or prawns) or store in a closed container to use as a dip or spread.
image